You can create a new project by pressing the New Project button 1. After that a popup for selecting a project type will be displayed 2.
Each project must have a project type defined. Project types are like templates for different kinds of projects. Project types define many aspects of a project and it's behaviour. It can be very convenient to create a separate project type for projects that clearly have their specificities. That way creating a new project with those same specificities is just a metter of selecting the same project type.

NOTE: By default, there is one project type provided by runsimply: Standard Project Type. If new project types have not been added into your system i.e. there is only one project type, popup for selecting project type 2 will not be displayed at all. Project will have Standard Project Type selected automatically.
After selecting project type, project creation page is displayed. This page contains several sections: General, Settings and Finance.
General section
General section contains some basic settings for a new project. Some of these settings are mandatory and they are marked with an asterisk, others are optional.
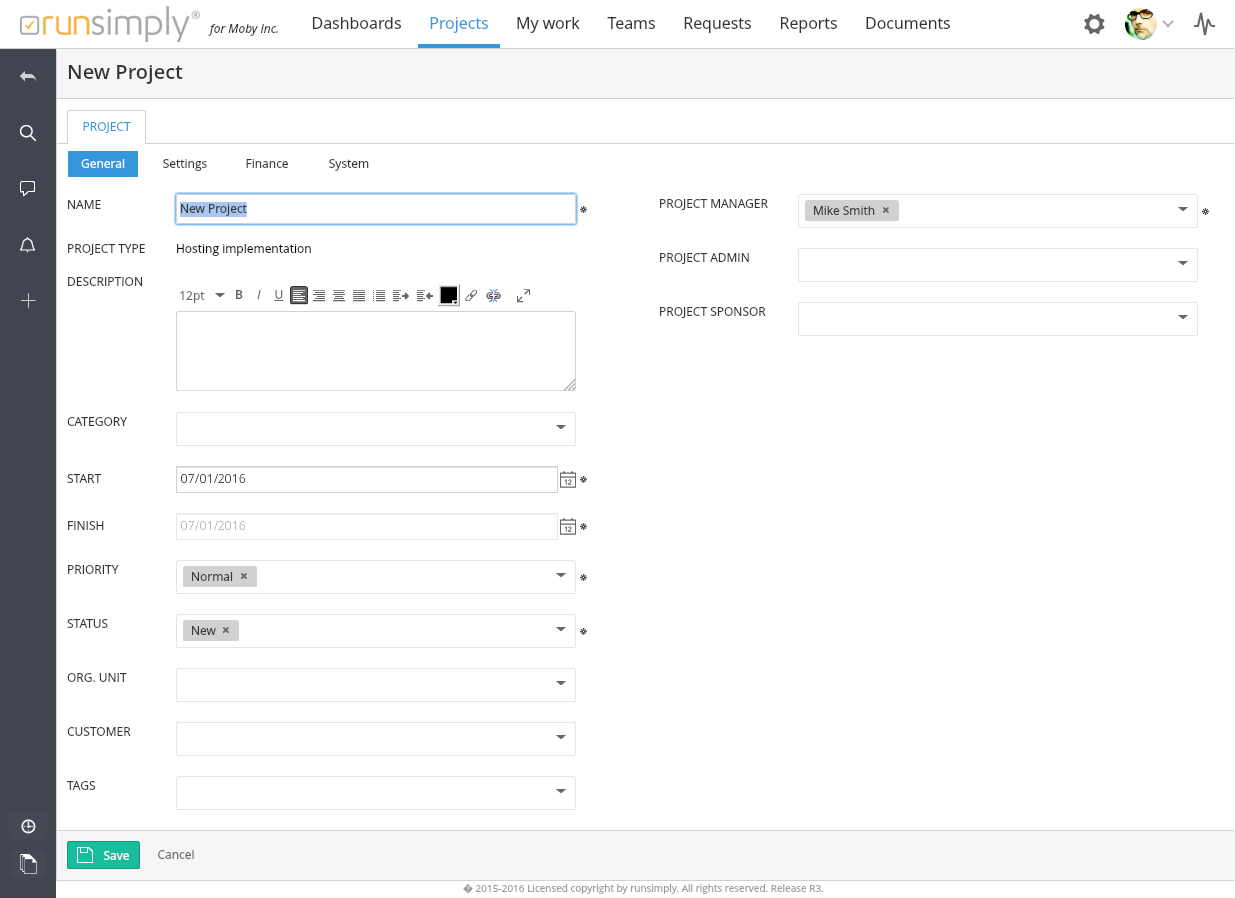
First a project must get a name. Try to be descriptive when naming projects but don't use too much text as it would only clutter places where project name is shown.
Project type cannot be edited as it's already selected for this project.
Project description can contain all the descriptive details of this project and it can be richly formatted.
Project category gives you the ability to group your projects by their context or meaning. Project categories can be created in setup section of runsimply. You can create as many project categories as you need.
Start and finish date define boudaries of a project. You can set only one of them, the other one is disabled. Which one you can set depends on scheduling type of a project which can be found in Settings section of this page. By default, projects are scheduled from start date. If you select the project to schedule from finish date, finish date will be enabled and start date disabled.
Using priority you can order your project by their current importance.
By default projects start with a status value New. As project progresses it goes through other statuses like In Progress, On Hold, Completed, Archived or Canceled. System will automatically put the project in In Progress status when some of it's tasks have progressed and when all tasks of a project are complete, project will automatically get status Completed.
Organizational unit of a project defined which part of the company is responsible for the project. This can be especially useful when you want to define project permissions is such a way that only a particlular department of a company should have access to this project.
Customer of a project can be an internal company or department or an external company.
Tags are usefull when you want to add additional labels to your project which you can use when searching for a project, grouping projects by tags or creating project reports. Tags can be selected from the dropdown list or they can be directly entered. When you enter a tag that doesn't already exists, it will automatically be added to the system.
Project manager is the person in charge of the project. Project manager also has the greatest permissions over a project.
Project admin is similar to project manager in the sense that it's another person that has great permissions over a project. Project admin can be usefull if project manager is not available or wants to share work and responsibilities with another person in company. Exactly what project admin can and cannot do can be set with project permissions.
Project sponsor is the person that can monitor the project to make sure everything is going as expected and according to business goals.
NOTE: Project manager, admin and sponsor will automatically be added to the list of project members and they will see the new project in their My Projects section.
Settings section
Settings section defines how new tasks will behave or how scheduling will work for this project.
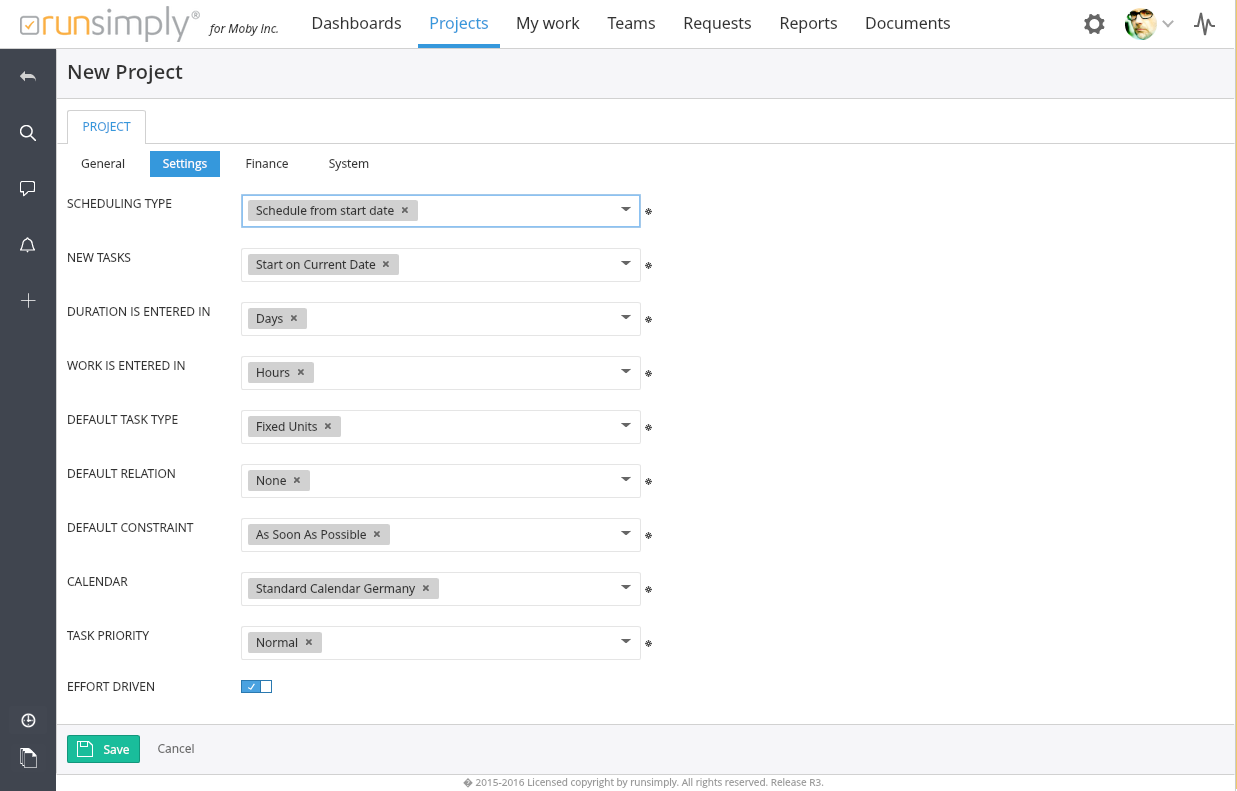
Scheduling type defines if the project will be scheduled from the start date forward or from finish date backward. You can also choose No Scheduling if you don't want runsimply to automatically schedule your project.
New tasks for this project can be set to start from current date or project start date. If project is scheduled from finish date, new tasks can start from project finish date.
You can define what is the default time unit for duration of tasks. By default it's days. When you enter duration for a task but you don't enter time unit (min, hrs, days etc.), this time unit will be used.
Just like for duration, default time unit can be set for work too.
Task type defines how a task will be scheduled. For example, if you want your task to last the same regardless of how many people work on it, set this field to Fixed Duration. If the amount of work is constant and more people can finish the task quicker, set it to Fixed Work.
Default relation determines how new tasks relate to their predecessors. By default, when a task has a predecessor, it will start once it's predecessor has finished.
Default constraint determines how a new task will be positioned on the timeline. By default tasks start as soon as possible but you can for example say that task should start no earlier that a certain date or that it should finish before a certain date.
Calendar is used in project scheduling to determine working hours, hilidays, exeptions to regular working hours etc.
Default task priority is copied to newly created tasks. By default, all tasks have Normal priority.
Effort driven is used for determining how task is scheduled. If task is effort driven, more people working on a task will finish that task faster.
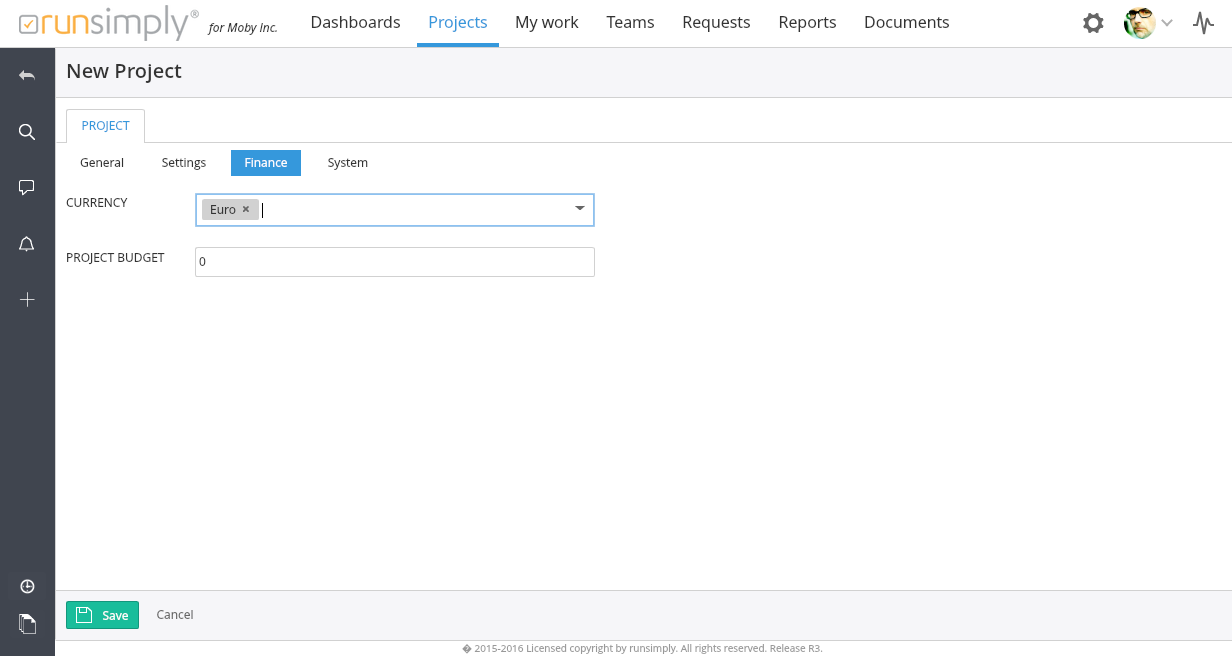
Finance section
Finance section determines the budget for the new project and it's currency.
NOTE: System section is not really a section for the project. That's a section that is used for creation, view and update for all data in runsimply: projects, tasks, requests etc. In this section you can get information like who created the item and when, who was the last person that updated it, what is the value of item's unique identifier etc.
After you have entered the values for the new project, press Save button and you are done, you can start working on it.
Like and share