This lesson provides guidance on using task checklists. Their purpose is to give you an efficient way to track the elements of a particular task.
If there are no checklists, the following screen will appear:

Adding checklists
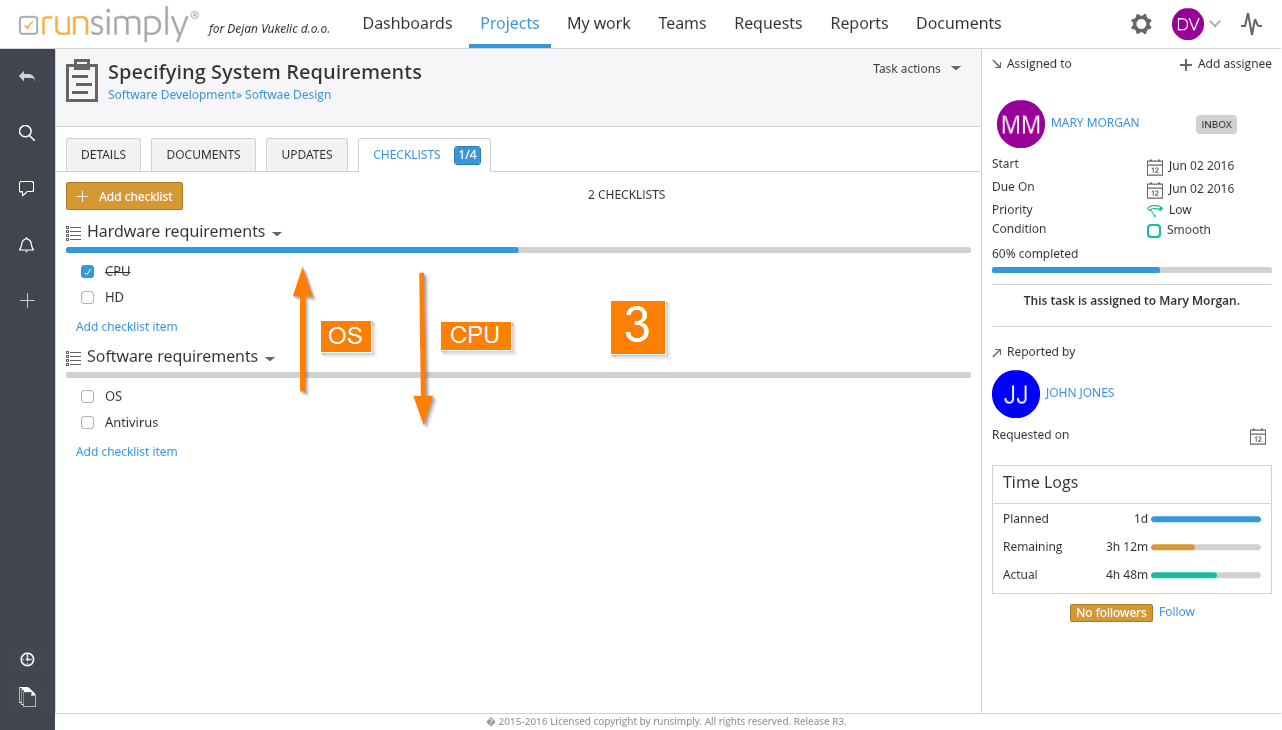
To add a checklist, click the Add Checklist button and enter a title. You can add as many checklists as you like. The Checklist tab shows the total number of checklist items and of those that are completed 1. Each checklist can contain multiple items 2 on a certain matter.

Order of checklist items can be changed using Drag and Drop 3.
NOTE: In case there are many checklists and items and they don't fit the screen, you can see the number of checklists on the top of the screen.
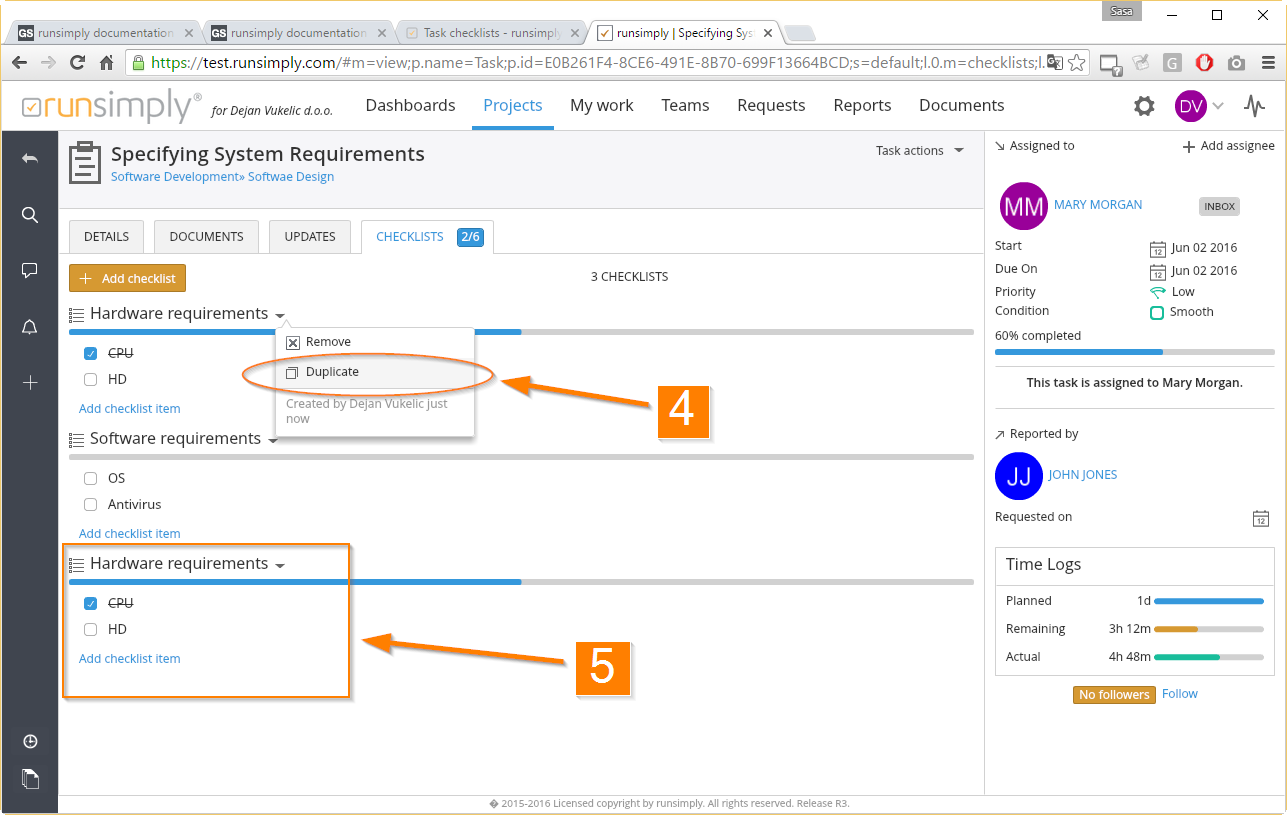
Copy a checklist
Each checklist contains options such as Remove and Duplicate 4. A duplicated checklist will contain all elements in the checklist which is being copied 5.
Add items to checklists
To add items into a checklist, click on the 'Add checklist item' link in the bottom of a checklist. When adding items you can easily add more items just by pressing Enter on your keyboard 6.

Manage checklists and items
You can change the name of a checklist simply by clicking on it. After the name has been changed press Enter and new name will be saved.
Changing content of the items works the same way. Clicking on a checklist item will enable you to enter a different content. Again, pressing Enter will save the changes you have made.
If you drag a mouse pointer over a checklist item a border will be drawn around that item. At the same time on the right side of the item an additional options (like deleting the item) are displayed.
Mark checklist item as finished
Every checklist marked as Completed 7, will remain visible but crossed off. It will also affect the Progress line which helps you track the completion percentage of your items. The Blue Progress 8 line shows the progress, while the Green one 9 indicates that all items of a particular checklist are finished.

Reorder you checklists and items
To change the order of checklists and checklist items, use Drag and Drop. You can also drag items between checklists themselves.
NOTE: If you want to copy a complete checklist, all of its contained items will be copied as well.
Convert Checklist into Request
Next to every checklist item is the button which, apart from providing information about the items’s creator, enables you to convert checklist item into a request 10.
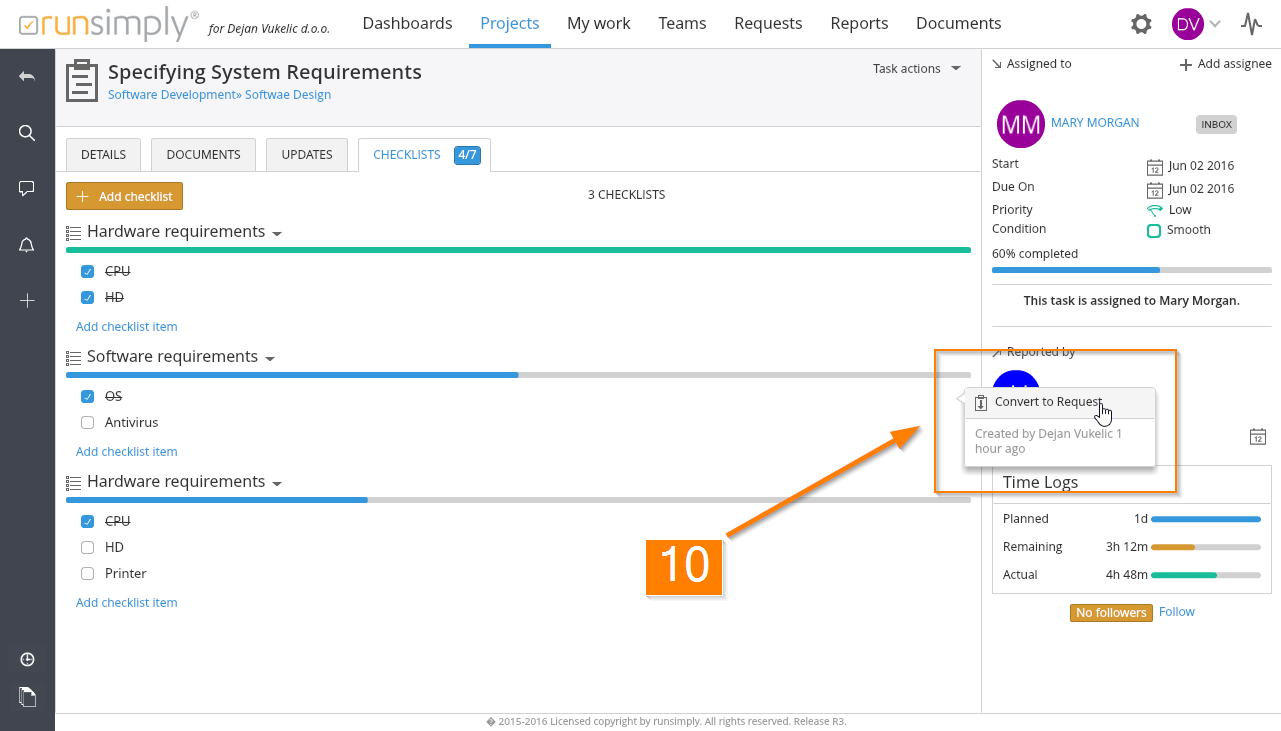
Once you click on the Convert to Request option, a new popup will appear allowing you to insert new request 11 (this is a standard popup which is discussed further in a separate lesson). After you have converted your checklist item into request, you will notice a lot of information about a new request already being set up based on the checklist item and its corresponding task.

NOTE: After an item has been converted into a request, the item will be removed from the checklist it used to belong to.
Like and share