In order to create a new grouping, click on the groupings tool 1 and then press the New Grouping button 2.
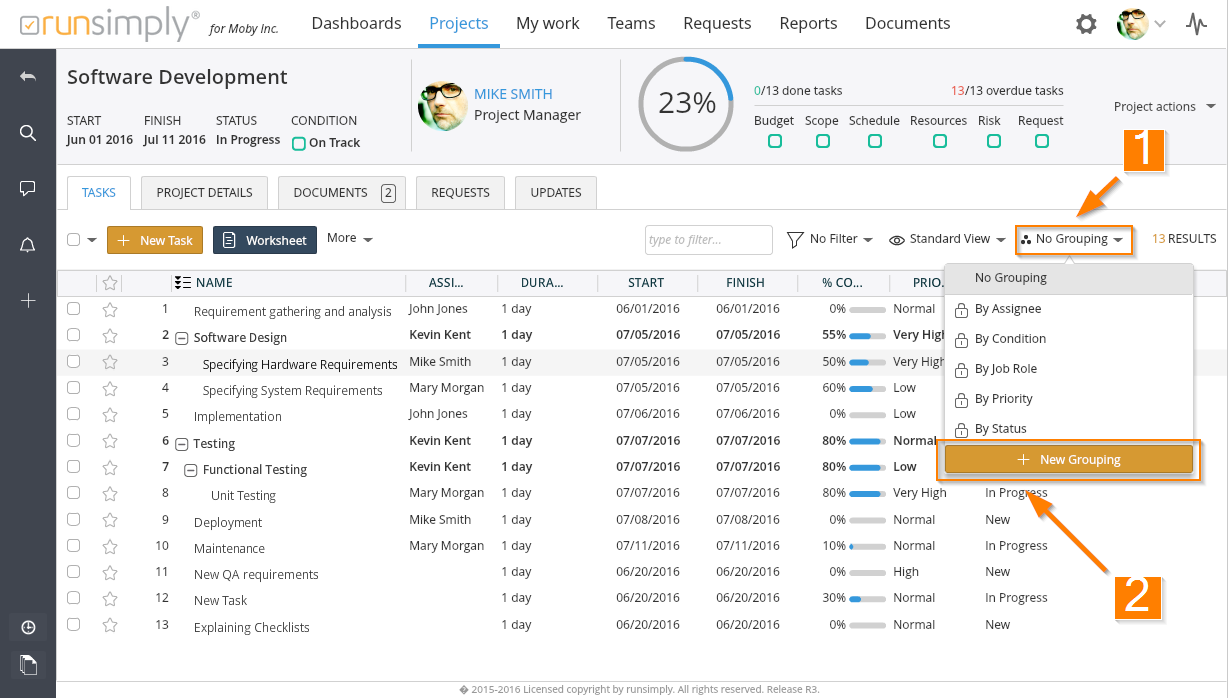
NOTE: You can create a new grouping also by copying existing one. To copy a grouping hover over any grouping that you want to copy, a copy icon will be displayed and pressing it leads you to the grouping creation page with all the data copied.
After pressing the New Grouping button a grouping creation page is displayed 3.
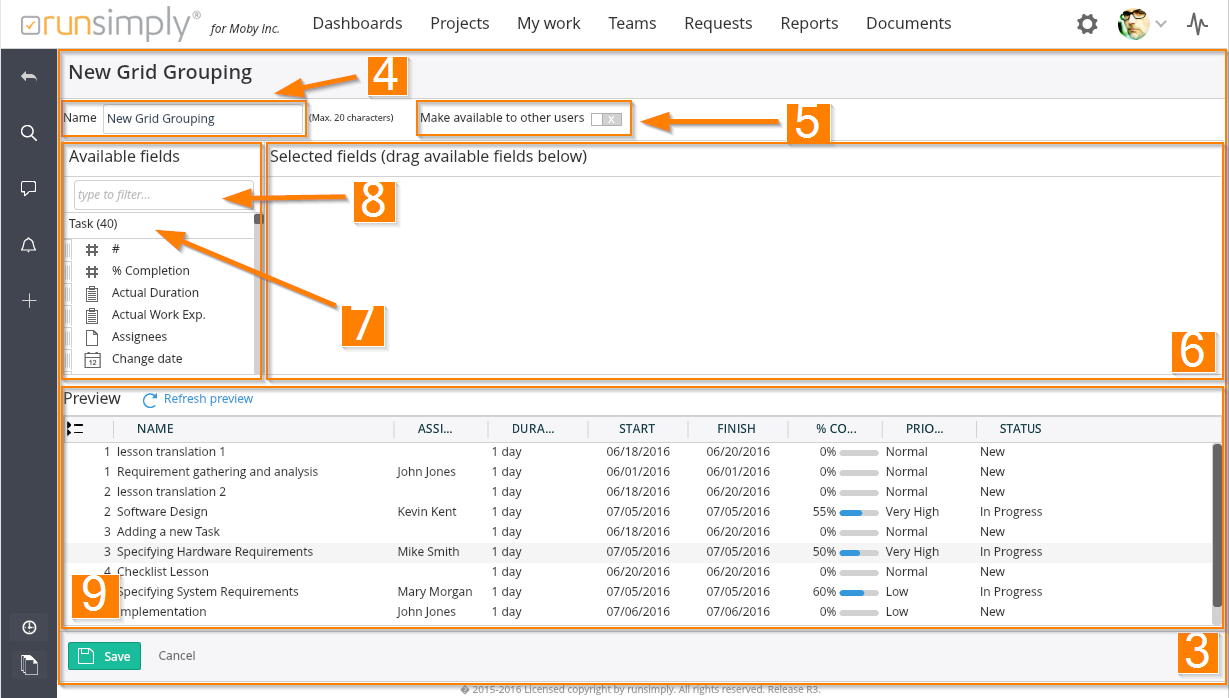
Try to give your grouping a short but a descriptive name that explains what it shows or what it's purpose is 4. You or other people might use groupings across runsimply so they should be able to understand what the grouping shows just by it's name.
Try to avoid names that say nothing about what the grouping shows or what it's for like 'Mark's grouping' or 'Custom task grouping'.
Much better names would be 'Priority' or 'Quarters and assignees'.
By default new grouping is private. That means only you can see and access it. If you want, you can allow others to access your grouping 5.
You can start adding columns to your grouping by dragging fields from the field list 7 to selected fields region 6 or you can just double click the field you want to add. Fields that have been added to selected fields are displayed in bold in the fields list 7.
NOTE: When you allow others to use your grouping, they won't be able to delete it but they will be able to modify it. Have that in mind as some of your groupings might be critical to your reports and you would't want others to mess with them.
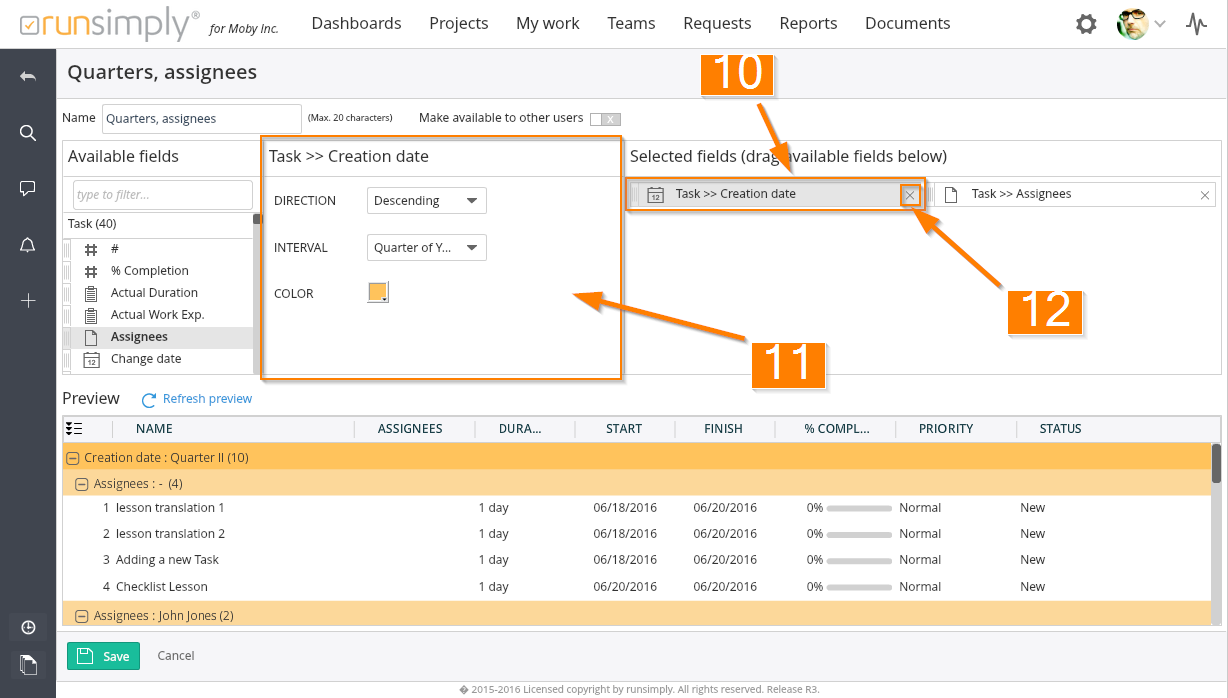
After you have added fields, you can rearrange them by dragging them around. When you click on a field in the selected fields region, you can further customize that field in the field settings section 11. Selected field is displayed with a bit darker background 10.
To remove a field from the grouping click on the remove button 12.
As you modify your grouping, add or remove fields, drag them etc. preview will be updated 9. Preview shows what the real grouping looks like at any one moment. It uses real data for display, if there is enough real data, and if not, it adds some more random data so you can have a better overview of the grouping you are creating.
Some modifications of the grouping might not trigger automatic preview reload like changing particular field's settings. Is such a case, modify selected field's settings and after you are done press the Refresh preview button.
After you are done creating your grouping, press the button Save. After saving it, you can use your grouping in related pages.
Like and share